Greetings!
 I’m Rosamond de Montfort, from the Canton of Dragon’s Bay, Barony of Aneala, in the Kingdom of Lochac.
This blog was originally set up to record my progress in the A&S 50 Challenge – which involved doing 50 things in the Arts and Sciences between May 1st 2007 – May 1st 2015, in honour of the SCA’s 50th Birthday. My challenge to myself was to complete 50 pieces of needlework. Happily I did indeed complete the challenge.
Now it’s 2023… eight years have passed and I had almost forgotten about this blog! So I’ve decided to resurrect it and to add some of my more recent projects. Hopefully I’ll not forget about it again!
(PS: And in the normal world my name is Anne and I live in Western Australia)

“An Unstitched Coif…” getting ready!
So this week I have been busily getting everything ready for the “An Unstitched Coif…” project. The introductory Zoom meeting is on the 26th April, so I need to have everything ready to begin stitching by then.
We have about six months before the exhibition at the Victoria and Albert Museum (not that mine will be in that) and the Sheffield exhibition (which mine *might* be in) is at the end of the year – date TBA.
Fabric:
I have a length of 56 count Kingston linen that I have been saving for a special project, and I think it will be perfect for “An Unstitched Coif…” To prep the fabric I tacked 1/4″ double folded hems on all sides to give me something nice and sturdy to lace into.
Thread:
Silk of course! I’m sure I have a couple of hanks of black silk in my stash somewhere, but it seems to have gone missing. If I can’t find it in time, then I’ll begin stitching with black Au ver a Soie – soie d’Alger.
I have ordered Kreinik Japan Thread #5 thread in both gold and silver from https://alisoncoleembroidery.com.au/. I could not decide which to use at this stage – who knows I might end up using both!
And spangles, one must have spangles, so I have also ordered 2mm gold and silver spangles from Alison Cole.
Stitching Frame:
I have a scroll frame that is the perfect size for this project. I also recently found a perfect pre-loved frame holder that will sit neatly on my lap so that I can sit and stitch with my feet up.


I don’t know how old the frame is, but they are still in production, and you can buy them from here: http://www.kscreations.com/lapframes.htm
The very best thing about this frame is that it is fully adjustable to hold most of the frame sizes that I would use.
I then stitched the top and bottom edges of my linen to the tapes, and side laced with a sturdy mercerized cotton thread.
Tracing the Design:
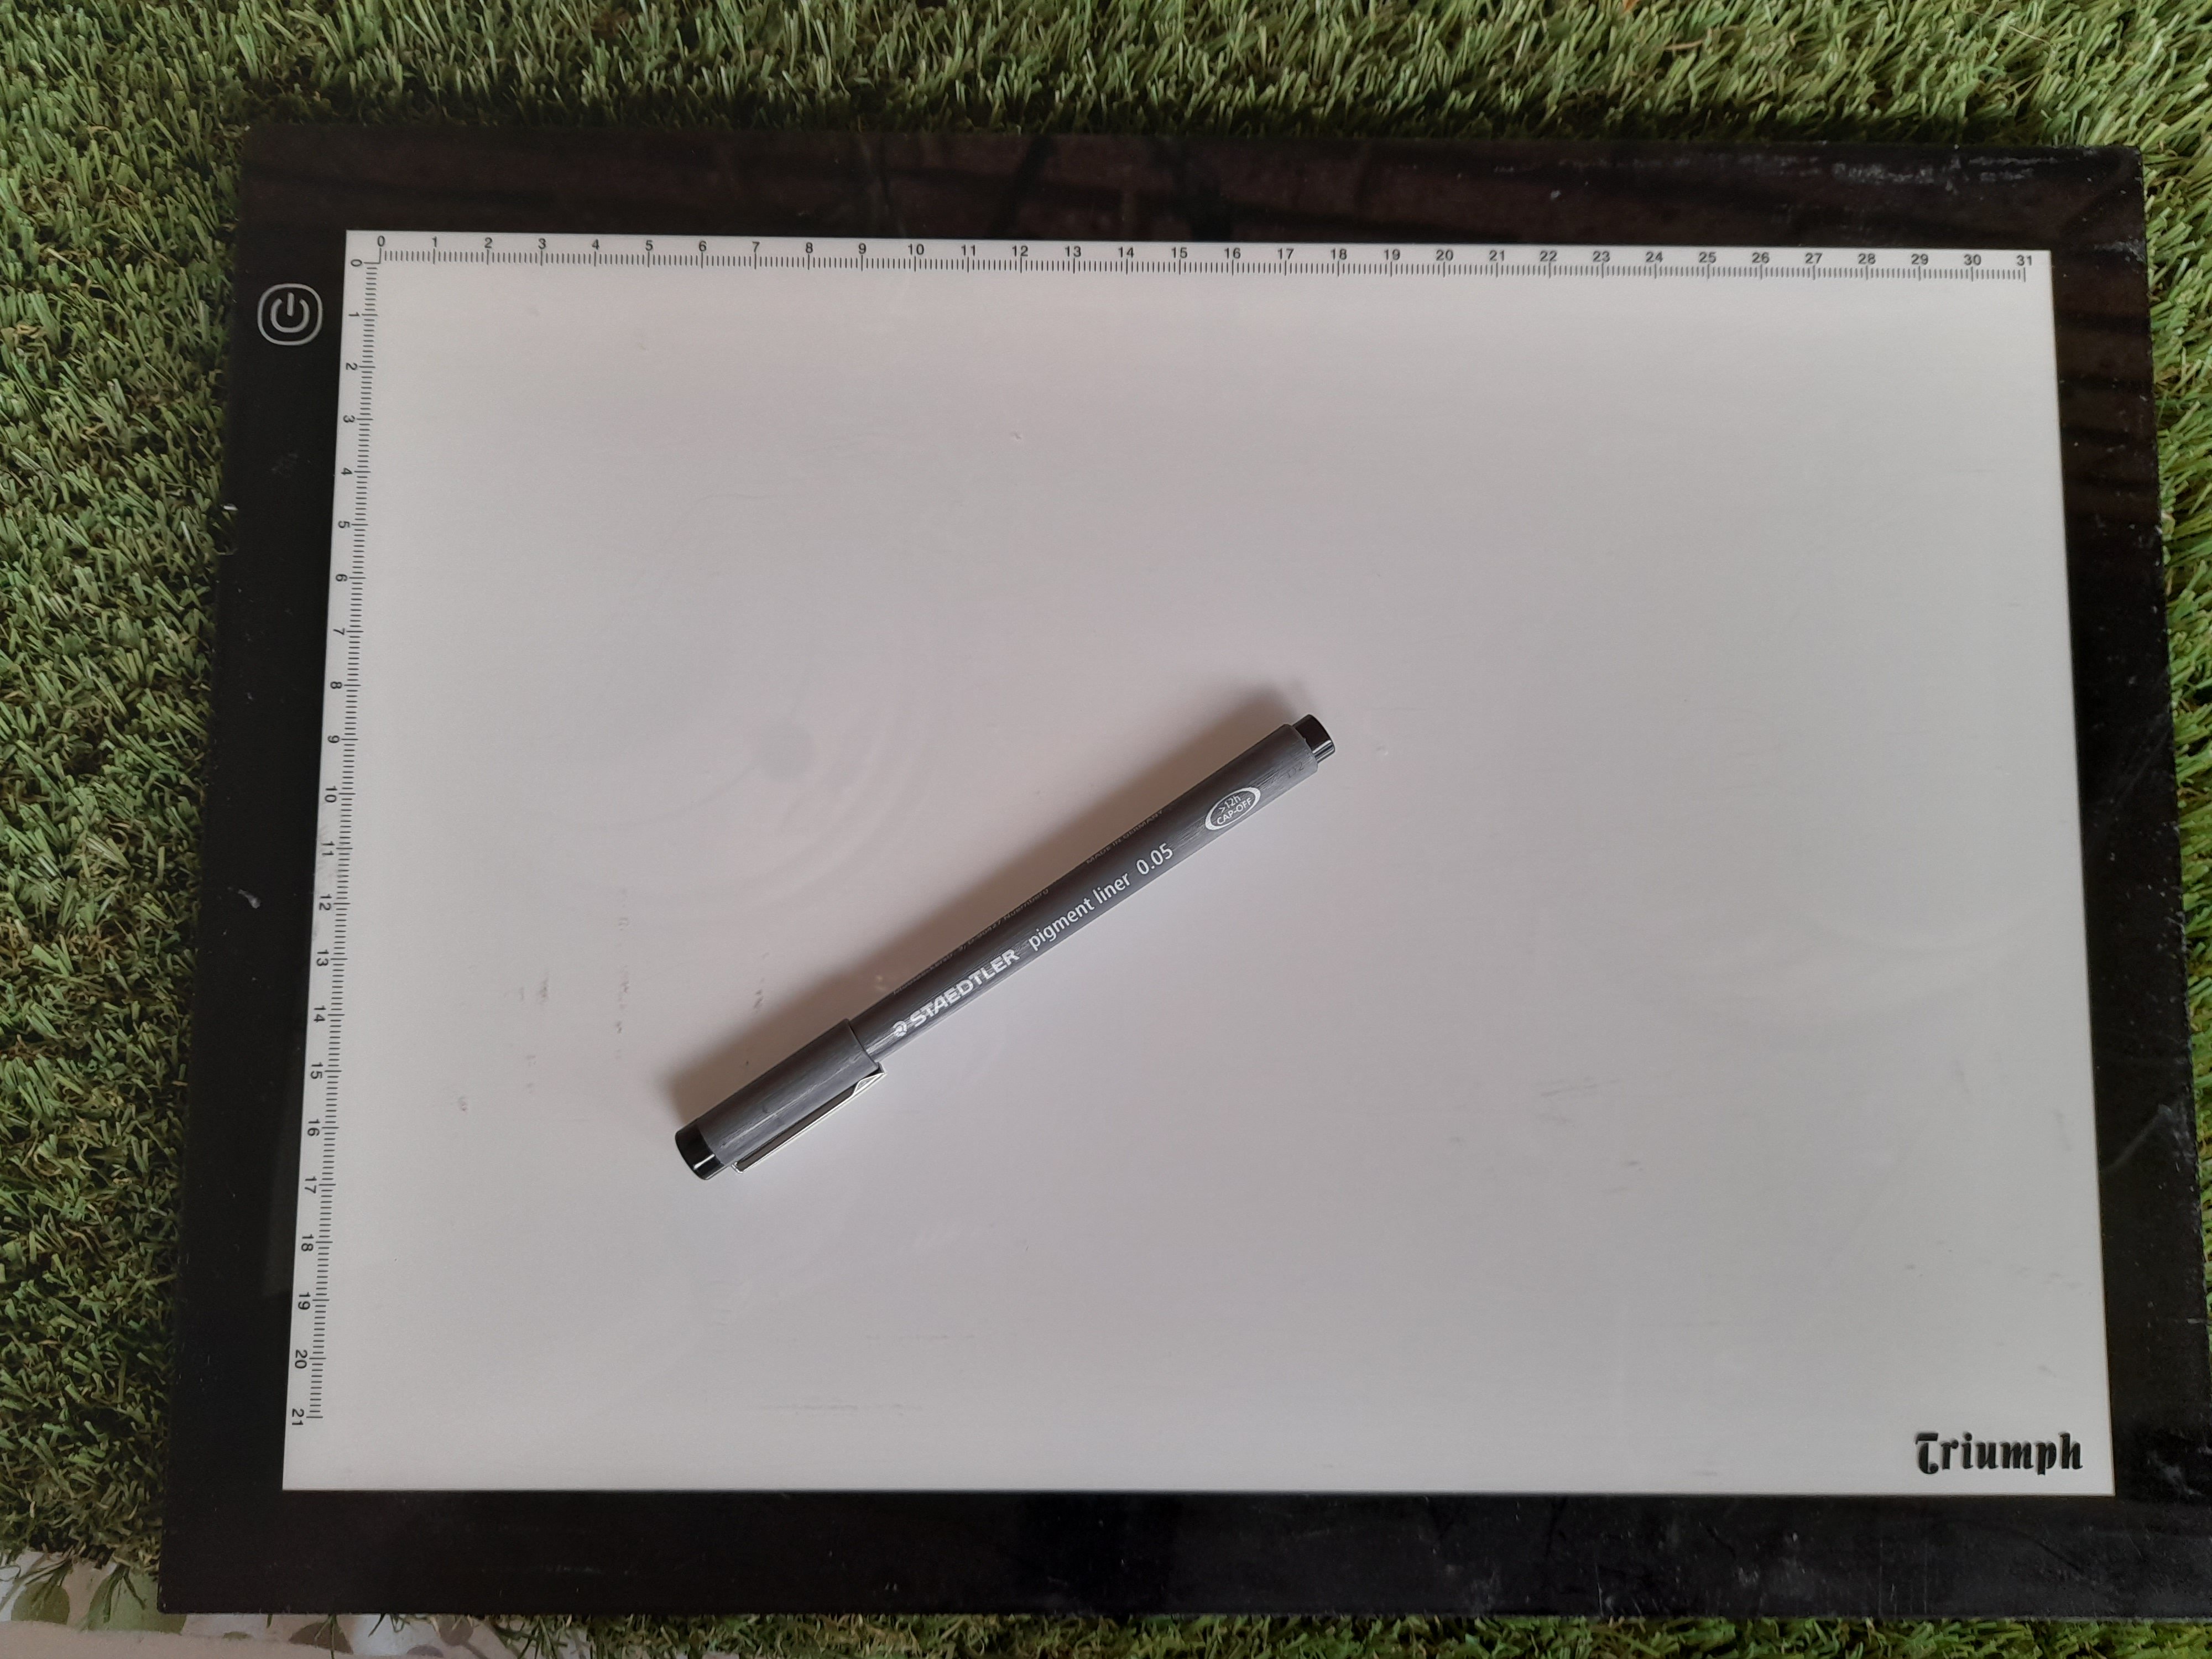
I thought about doing “prick and pounce” to transfer the design, but decided that while it might be historically correct, it would take f-o-r-e-v-e-r to prick such a busy design, so I opted for the light pad and pigment ink pen method.
I used a Staedtler pigment liner pen 0.05 in black. It says that it is indelible and waterproof on paper. It made me wonder why they specified paper, so I made a test tracing and soaked it in plain cold water for 2 hours. No bleeding or fading. So I then soaked for another 2 hours in hot soapy water. Still not bleeding or fading, so I am sure that I am safe to use it for the tracing.
Of course, my linen is now tightly laced onto the frame. How am I going to trace the design? I certainly did not want any movement whatsoever while tracing, so I ended up using tape to stick the design to the back of the fabric and the frame. It worked a treat!

Several Hours Later…


And now the hard part begins…. I need to work out how to stitch it! So I’m hitting the books and trolling the internet looking at what stitches were done in period and for ideas that inspire me.
“An Unstitched Coif…”
I was recently reading the Historic Embroidery Group in Facebook, and came across a link to this post by Kim Salazar: “An Unstitched Coif…” I was immediately fascinated and wanted to be a part of this exciting project.
At the beginning of March 2023, Toni Buckby put out a call on her Facebook page:
“Artist and needleworker @tonibuckby is looking for 40 experienced embroiderers
to take part in a co-created art project as part of her PhD on the Blackwork Embroidery
collection at the Victoria & Albert Museum“
The call was then expanded to include just over 100 other participants from around the globe…. and I am one of them! So all up, we have just over 140 embroiderers working on their own version of the same pattern. It will be fascinating to see how we each choose to stitch the design.
Toni is working on her PhD in embroidery, focussing on the experience of the embroiderers themselves. While researching in the Victoria and Albert Museum, Toni had the opportunity to study the imaginatively named “Panel, unknown” in the V&A collections. This coif was partially stitched and then unpicked, but the pattern is still clearly visible. It’s a somewhat busy but rather charming compilation of flowers and whimsical bugs.

Toni Buckby says that: “One of the main goals of the project is to capture a part of your embroidery-making experience, which is entirely missing from the historical Blackwork embroideries I have been working with.”
To this end, there will be face to face workshop sessions in the U.K. and also Zoom meetings for those located in other corners of the world. ( I am in Western Australia). Toni has also set up a website for the project: Blackworkembroidery.org (still under construction).
Even though I am a fairly experienced embroiderer, I have only ever done counted blackwork before, and have never attempted blackwork fills, so this is definitely going to be a learning curve for me for sure!
My Heraldic Purse

While browsing the Victoria and Albert Museum website last year, I came across this little beauty… The Calthorpe Purse.
It inspired me to try to make something similar, but featuring my family heraldry on one side, and the other 3 sides featuring the heraldry of those within the SCA who have inspired me.
The purse is described as:
This formal, heraldic purse associated with marriage has more significance than a purse used simply for money, or a ‘swete-bag’ used for carrying perfumed herbs to sweeten the atmosphere. Both men and women carried or wore pouches or purses. The long strings of this example suggest that it was intended to hang from the waist, but it is uncertain whether it was ever actually used as a container. English purses of this date are extremely rare and the survival of this one may be due to its formal role, which meant that it was rarely used and thought worth looking after.
Calthorpe Purse Embroidery detail:
“Four panels in a shield shape, each embroidered in silk in tent stitch on linen. It is decorated on all four sides with marshalled arms recording family alliances.”
The purse is made of linen, embroidered with silk in tent stitch, worked with 1,250 silk stitches per square inch. (194 sts per square cm).
Dimensions: Width 10.2cm, height (including tassel) 15cm, depth 15cm.
MY HERALDIC PURSE
Linen: I chose a 36 count even-weave linen in a natural colour. This works out to 1296 stitches per square inch, so it’s actually finer than the original!
Silk: I used Au ver a Soie, Soie d’Alger, using 2 stands of silk over 1 thread of linen. I usually use Madeira silk for embroidery as it is much cheaper, but I find it tends to become a bit “fuzzy” so I thought it worth the extra expense to use Au ver a Soie for this project.
Lighting and Magnification: Excellent lighting and magnification are essential for this project. I use a Daylight Company floor lap which provide great light with no heat. I also use Mag-Eyes hands free magnifiers to see what I am actually working on.
Charting the Designs: I originally tried putting the images into photo editing software and reducing the number of colours to create the charts. That was a total fail! So after messing about with other options, I ended up charting them (digitally) by hand, pixel by pixel, using an ancient version of Paint Shop Pro 5. Given that I have only allowed myself 40 stitches per device, it was quite a challenge charting the designs so that they were fairly readable and as true to the original as I could make them. (Plus, fitting a shield shaped device into aa long oblong is actually harder than you’d think).
PANEL 1 COMPLETED: Charting the designs and working the panel: 203 hours!
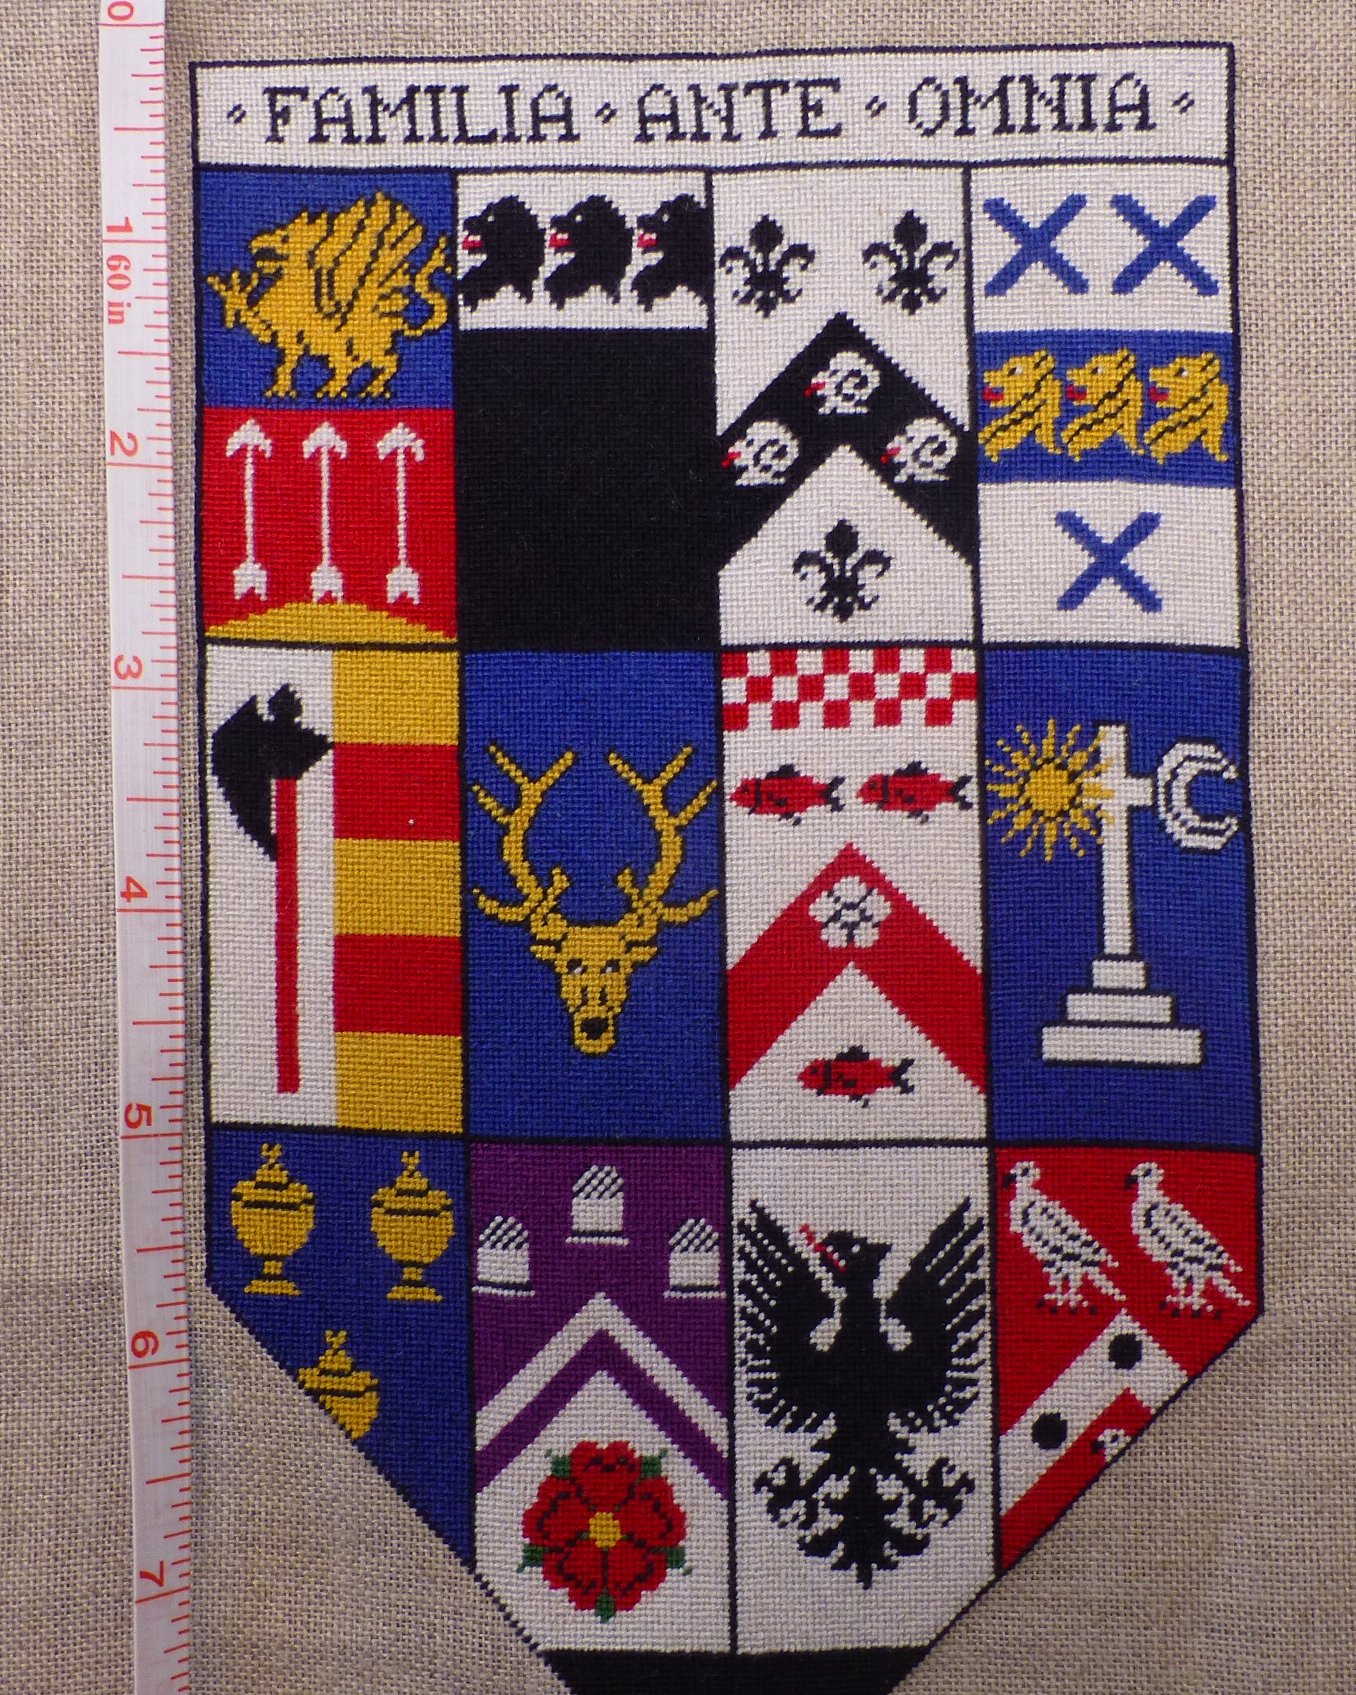
| Motto: | Familia Ante Omnia | Family Before All | |
| LANGE My mother | RICHARDSON My father | RAMSDEN Husband’s father | GALE Husband’s mother |
| GOTTSCH Maternal grandmother | McKENZIE Paternal grandmother | McBRIDE Maternal grandmother | MARTIN Paternal grandmother |
| SETH Daughter-in-law | ROSAMOND de MONTFORT My SCA name | BACK Son-in-law | RIDLEY Step father |
Long Armed Cross Stitch Cloth
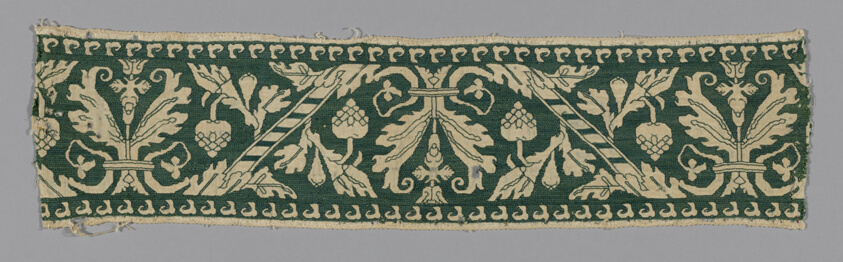
I recently completed a voided-work cloth, worked in long armed cross stitch. Voided work means that the background is embroidered and the unworked areas form the design. Often called Assisi work, the stitches used can include basic cross stitch, Italian cross stitch and long armed cross stitch. In many cases the design was outlined in back stitch or double running stitch, and then the background was filled in, most often in red, but examples can also be seen in blue and green.
Towels and borders of this style were made in Italy, beginning in the 13th and 14th centuries with ecclesiastical cloths and expanded into more common usage in later centuries. I have used those designs as inspiration for a small tablecloth.
Extant Examples:
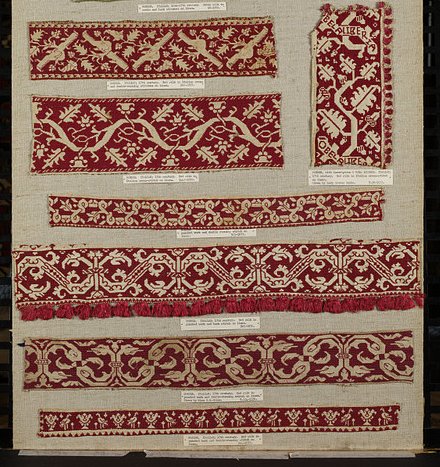
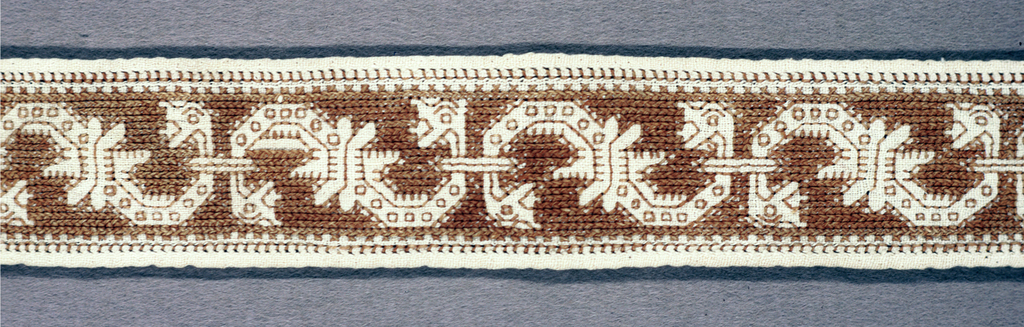
This sample is from the Victoria and Albert Museum and is described as:
BORDER
17th century (made)
Embroidered in silk thread on linen in Italian cross and double running stitches. It is worked in monochrome red silk so that the pattern is left reserved in the colour of the linen, i.e. only the ground is worked, and the stitch is pulled tight so that it resembles punch work.
These examples are worked in Italian cross stitch, which is quite different to long armed cross stitch, however it is the style and look that I wanted to achieve with this piece.
 |
From the Art Institute of Chicago
Italy, Made 1501–1700Linen, plain weave; embrodered with silk floss in back and long-armed cross stitches |
 |
Cooper Hewitt Smithsonian Design Museum
16th or 17th century Spainery little information on the website, but it is clearly long armed cross stitch. |
My Work:
I have worked my towel with 1 strand of Madeira silk floss on 40 count Newcastle linen, and the design is taken from Renaissance Patterns for Lace, Embroidery and Needlepoint – An unabridged facsimile of the “Singuliers et nouveaux pourtraicts” of 1587, by Federico Vinciollo.
The particular design that I chose appears to be intended to be worked in filet lace, however it does work splendidly as a counted stitch pattern and is also very reminiscent of the designs seen in Perugia towels.
(PS: I know it looks like plain old cross stitch, but it really IS long-armed cross stitch!)


Lochac Arts & Sciences Champion Pouch
In AS49 (2014) Lady Ydeneye de Baillencourt (now THL Violetta Vasari) became the Lochac Arts & Sciences Champion. It is traditional for the A&S champion to be given an embroidered pouch to mark their achievement.
|
|

I chose a lovely dark blue velveteen fabric to make a pouch in a shape similar to one that Ydeneya had admired. The pouch was lined with white silk.
The A&S candle within an arch was worked in split stitch with Madeira silk on a linen ground. These were then appliqued to the velveteen pouch. The stars were embroidered directly on the pouch and 4 gold spangles added for extra bling!
The champion’s pouch also has the year embroidered on the back, so I embroidered the date with stem stitch directly onto the pouch, and then added three bells to the bottom edge.
At this stage I realised that when the pouch is closed, the front flap does not sit nicely, so I then added heavy gold beading around the edge. This not only added enough weight to help it sit nicely.

|
 |
Blackwork Collar & Cuffs
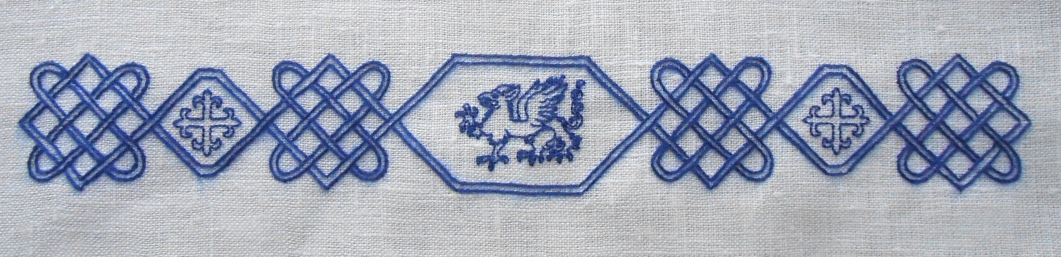
In 2016 (AS XLX) I offered to make a set of blackwork collar and cuffs on behalf of the WCoB for King Steffan I .

I based my design on King Steffan’s personal heraldry:
Quarterly azure and Or, a griffin passant sable
between three crosses fleury counterchanged.
I used a navy blue Madeira silk thread on linen, and worked the griffin and crosses within an interlaced knotwork design. The knotwork was inspired and adapted from a similar knot found in the Jane Bostocke sampler (1598).

#55, 56: Aprons Galore!

It seems that people like my aprons. 🙂 I had several enquiries about them at the Autumn Gathering on the weekend, so it looks like there’ll be even more to follow.
I have just finished another two – one worked with black silk (right), and another whitework one (pic to follow).
And… I have a super special totally delicious one in planning for an upcoming competition. Not sure if it can be completed in time, but I’ll certainly try!
#54: Viking Coat
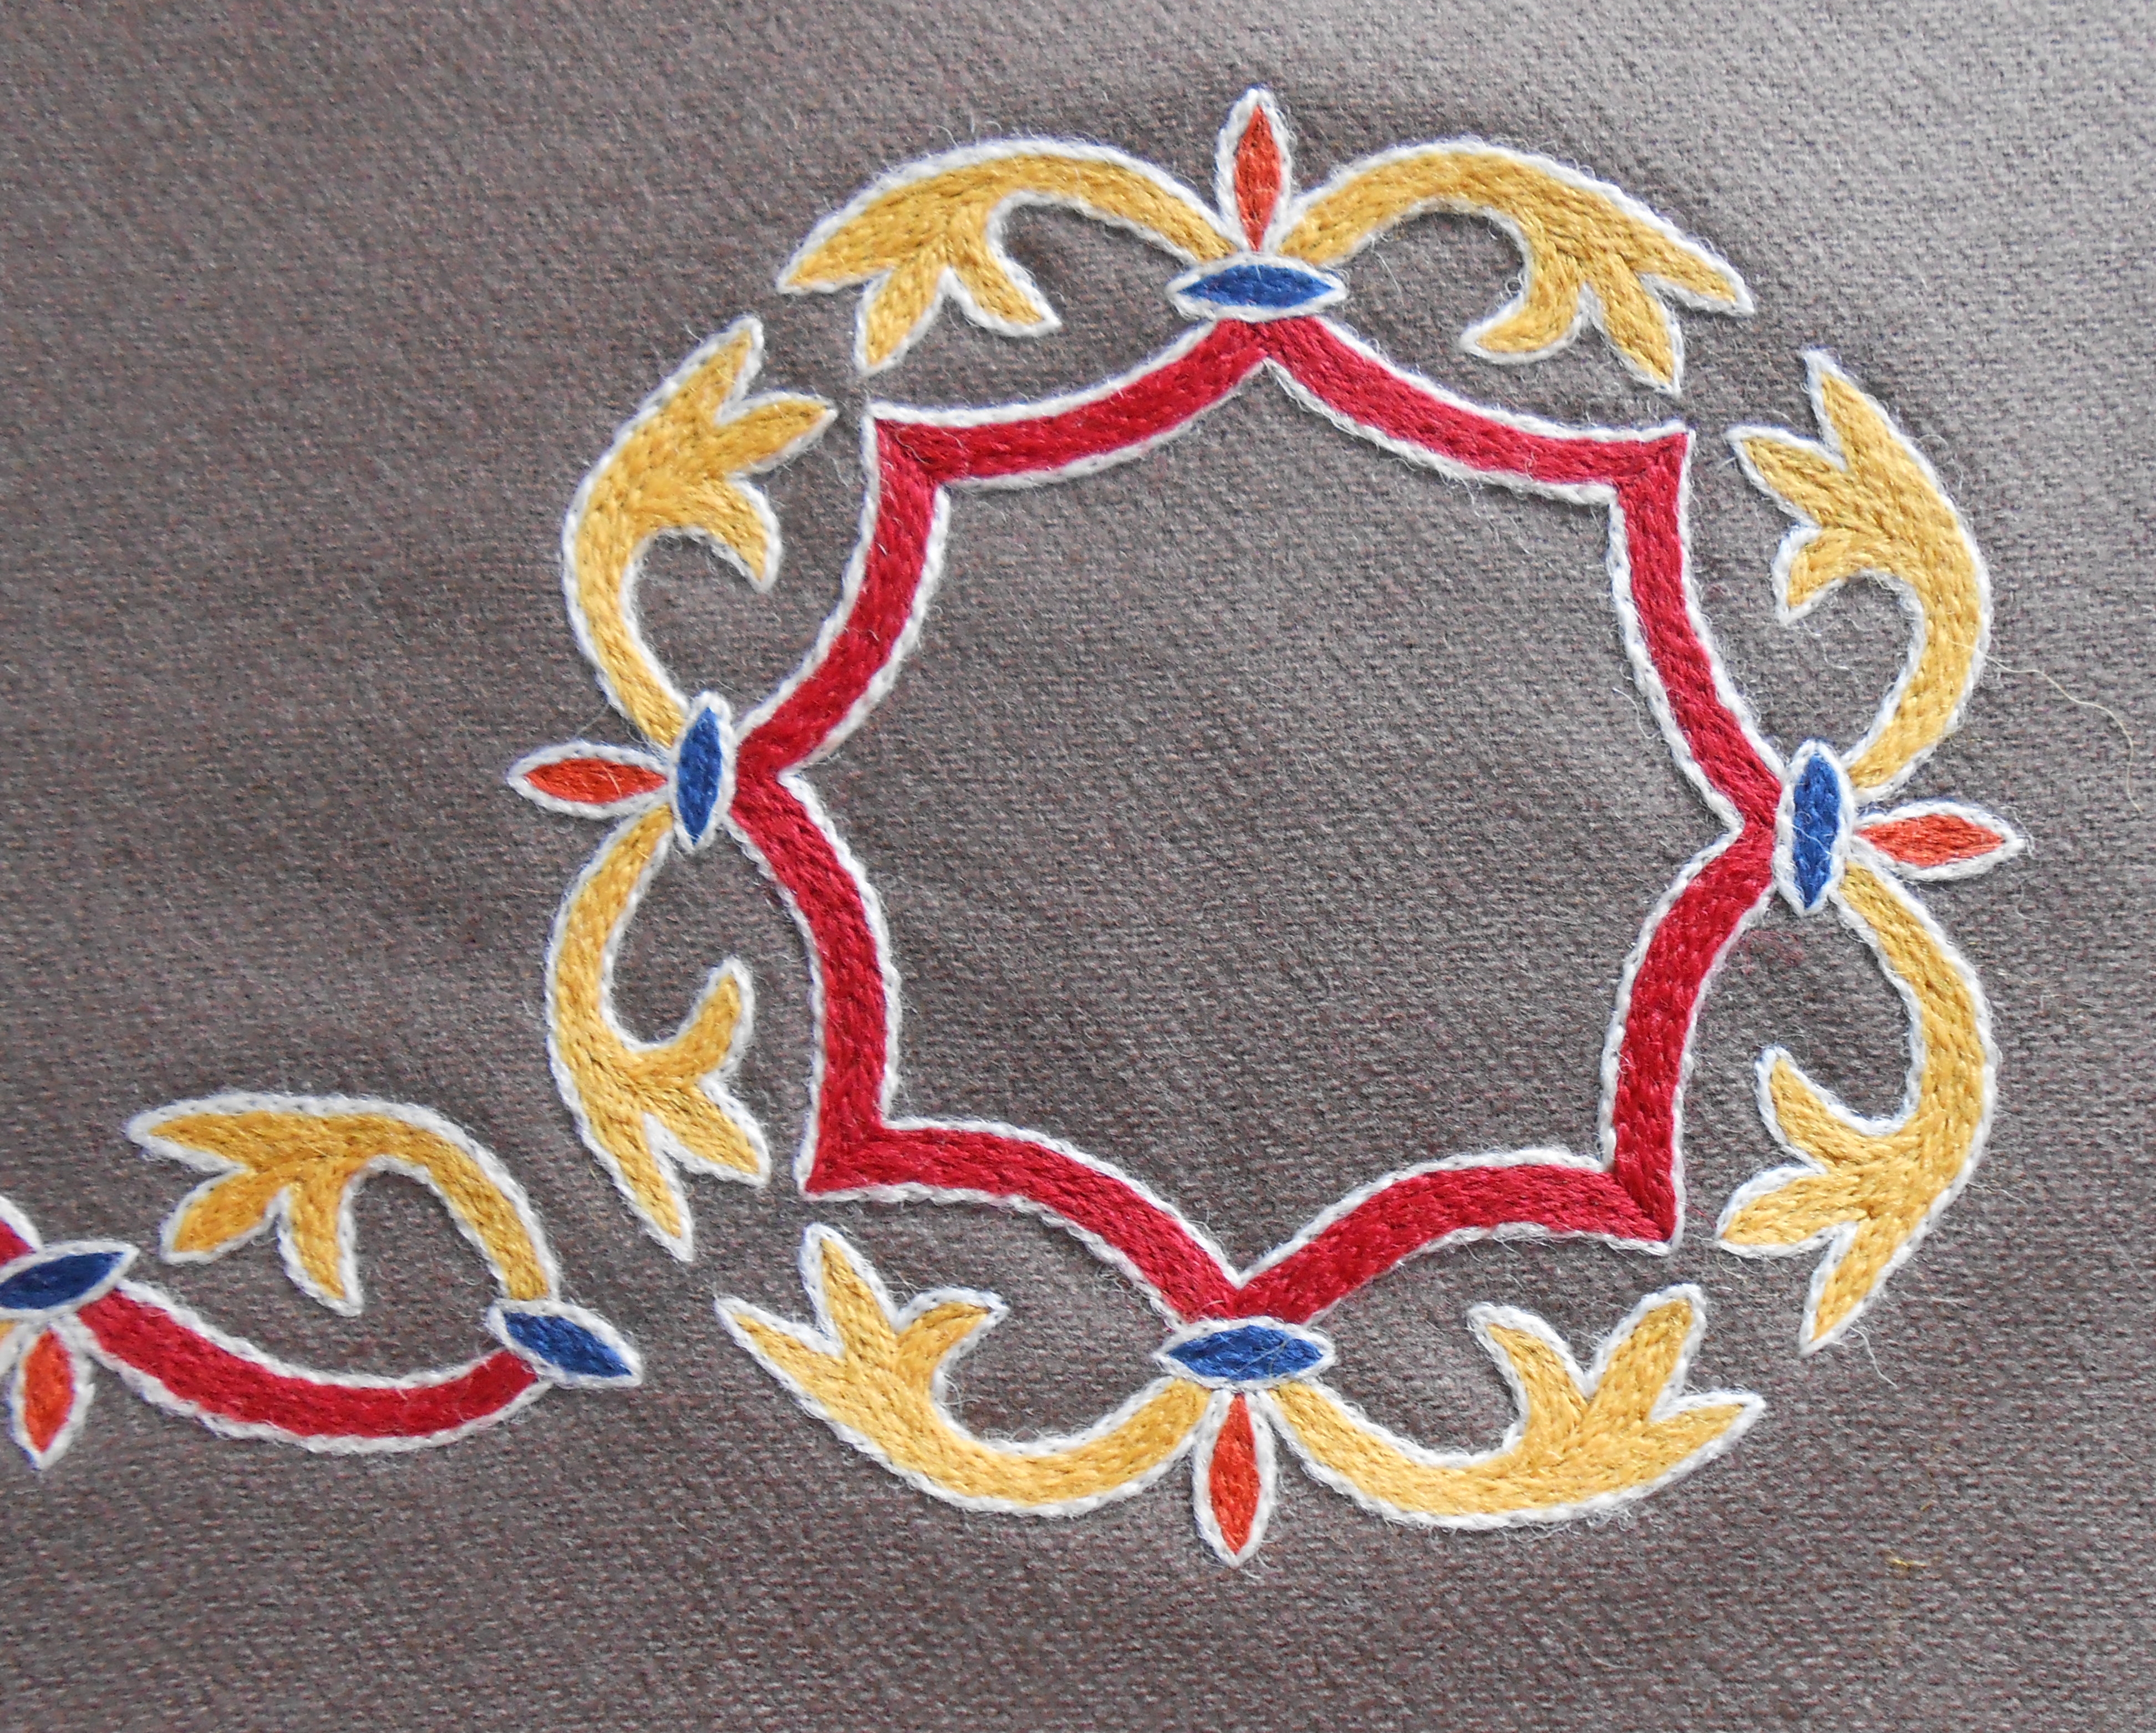
This is not completed yet, but I thought I’d show a “sneak peek” of my current work. I am making a Viking Coat using the pattern from Viking by Nille Glasel.
I decided to work the Acanthus design from Embroidery from the Tenth Century Viking Grave at Mammen Denmark around the hem, neck and sleeve edges of the coat.
It is worked in split stitch with 1 strand of Appleton’s wool on a lovely taupe woolen fabric. Rather than have the simple acanthus vine all around the edge, I decided to vary it by working a vine circle at the front bottom edges.
So far, I have been stitching for 10 days and half the bottom hem is done – in total the hem will be 136 inches (3.5 metres)
Update: The bottom edge is finished! There’s 86 hours into it so far. I’ve made the coat to a wearable stage, but fully intend to continue stitching until the border is worked around all edges including the sleeves.
#53: And Another Hemstitched Apron…

But wait… there’s another apron!
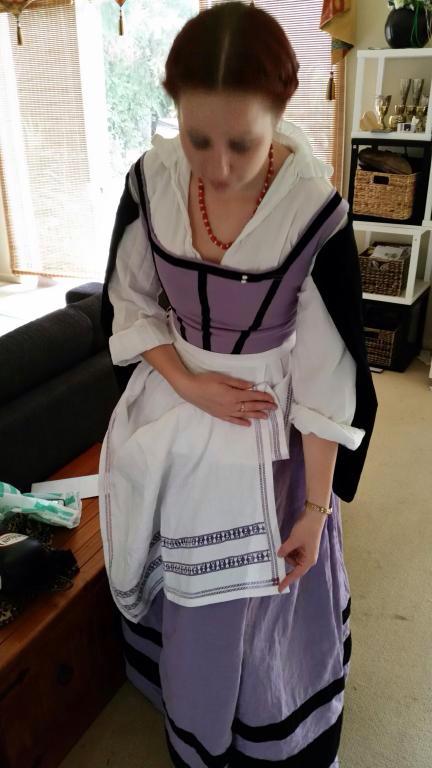
This pic shows the lovely Lady Vienna Maria de la Rosa wearing one of my aprons – this one was worked with purple threads as a special request. 🙂
I used Madeira silk for the hemstitching, and DMC Perle 8 for the coral knot cluster rows.
#51, 52: Hem Stitched Aprons

But wait… here’s more aprons!
I seem to be in an apron-making phase at the moment… or maybe it’s because they seem to be an ideal contribution for a couple of worthy causes. Either way, I am really enjoying making them as they are reasonably fast to make, and they are not only beautiful, but they are also very practical items!
The first apron is for the Rowany Festival Fighter Auction prize table for 2015.
Worked on the same lovely suiting linen with DMC Perle 12, this one has 2 narrow bands of zigzag hemstich, with a wide band of ladder stitch bordered on both sides by four-sided stitch.

And the second apron is destined to be part of the Lochac Raffle, which will be drawn at Rowany Festival in April 2015. The theme for this year’s raffle is “Tudor”.
It features twin rows of zigzag hem stitch around the sides and bottom, and a row of four sided stitch in between.
